DaVinci Resolveで複雑なfusionを利用せずエディットモードだけで映像内に枠を作成する方法を備忘録として書き残しておきます。
この方法を利用すると…
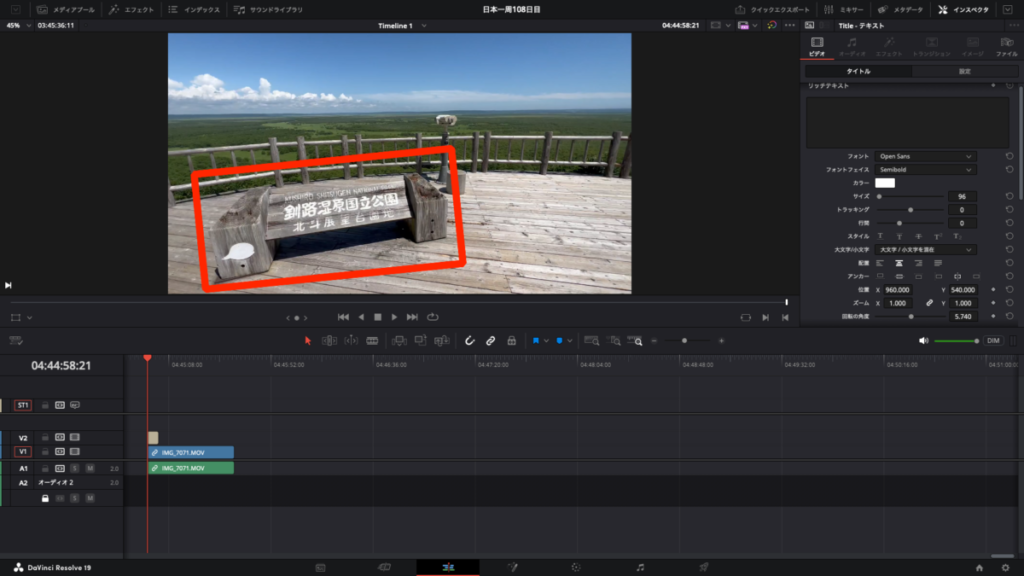
映像内に下の写真のような枠を簡単に入れることができます(枠の色や太さ、角度なども自由自在)
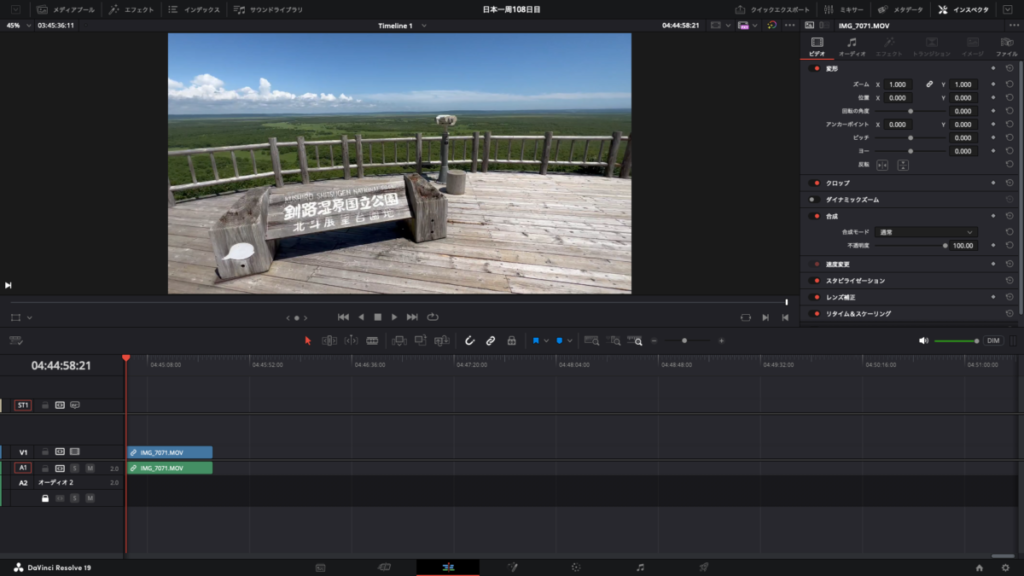
枠なし
枠あり
![DaVinci Resolve 枠 入れる前](https://photoroamer.jp/wp-content/uploads/2024/11/8fc2b93ca2598aa7fdf77de179cb56af-1024x576.png)
![DaVinci Resolve 枠 入れた後](https://photoroamer.jp/wp-content/uploads/2024/11/950cc987b77a14a67e4bf356d8c2ef12-1024x576.png)
fusion利用なし|DaVinci Resolveのエディットで映像内に枠を作る方法
DaVinci Resolveに詳しくない私には難しいfusionモード…
![DaVinci Resolve 枠 fusion](https://photoroamer.jp/wp-content/uploads/2024/11/32b6ed7cb5c7d77e7f3dee2726125e60-1024x576.png)
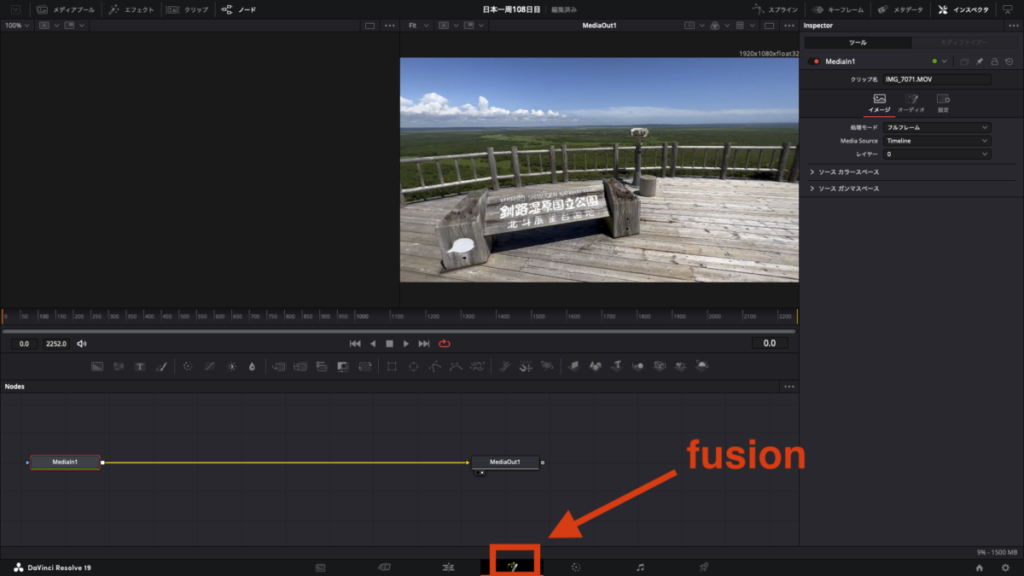
fusionモードでは簡単に映像内に枠を入れられるようですが、私がいつも利用しているエディットモードで映像内に枠を入れるやり方を紹介します。
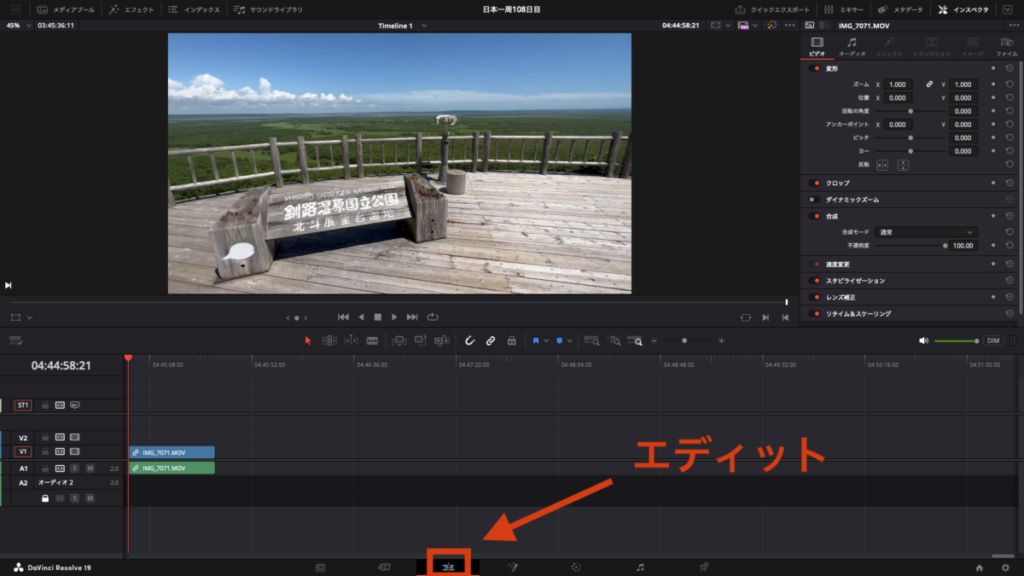
![DaVinci Resolve エディット](https://photoroamer.jp/wp-content/uploads/2024/11/43ed1cd27d6d7cf538a52c43355da81e-1024x576.png)
- 枠用のテキスト挿入
- 枠用のテキスト編集
- 枠の位置・角度調整
1.DaVinci Resolve|枠用のテキスト挿入
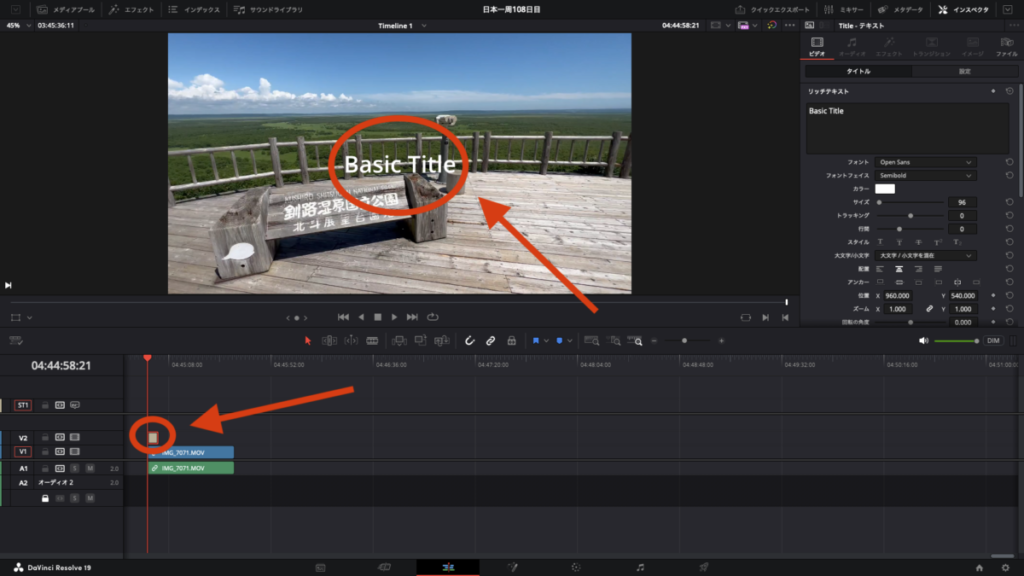
エディットモードの中にあるエフェクトを選択しタイトルの中にある「テキスト」をタイムライン上にドラッグ。
![DaVinci Resolve 枠 エフェクト](https://photoroamer.jp/wp-content/uploads/2024/11/1cde7cd2fef898663c71a7e2d5faf7ca-1024x766.png)
タイムライン上にテキストを移動すると映像内に「Basic Title」と書かれたテキストが出現。
![DaVinci Resolve 枠 エフェクト テクスト挿入](https://photoroamer.jp/wp-content/uploads/2024/11/260c73f63fbd3f548c75c915b39d5086-1024x576.png)
2.DaVinci Resolve|枠用のテキスト編集
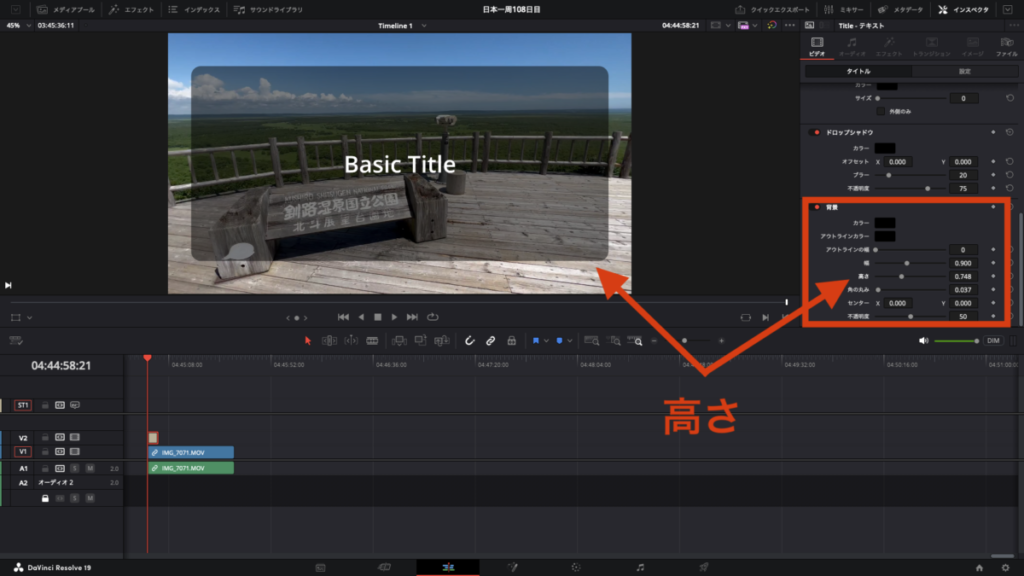
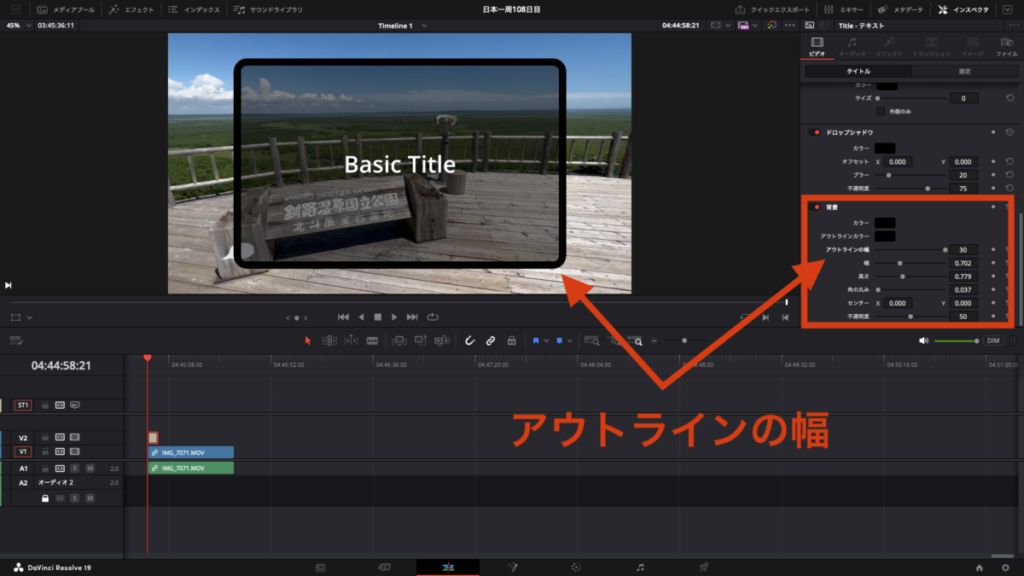
映像に出現したテキスト編集で「背景」の中にある「高さ」を調整すると映像のBasic Title周辺に半透明の枠が出現。
![DaVinci Resolve 枠 高さ 調整](https://photoroamer.jp/wp-content/uploads/2024/11/c1f3af44041b7c53481141d85c847f59.png)
![DaVinci Resolve 枠 高さ](https://photoroamer.jp/wp-content/uploads/2024/11/dc6a0907179be1bd8d78e2104db80e88-1024x576.png)
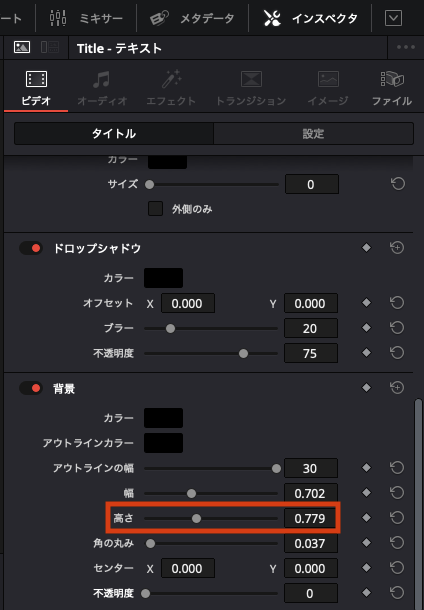
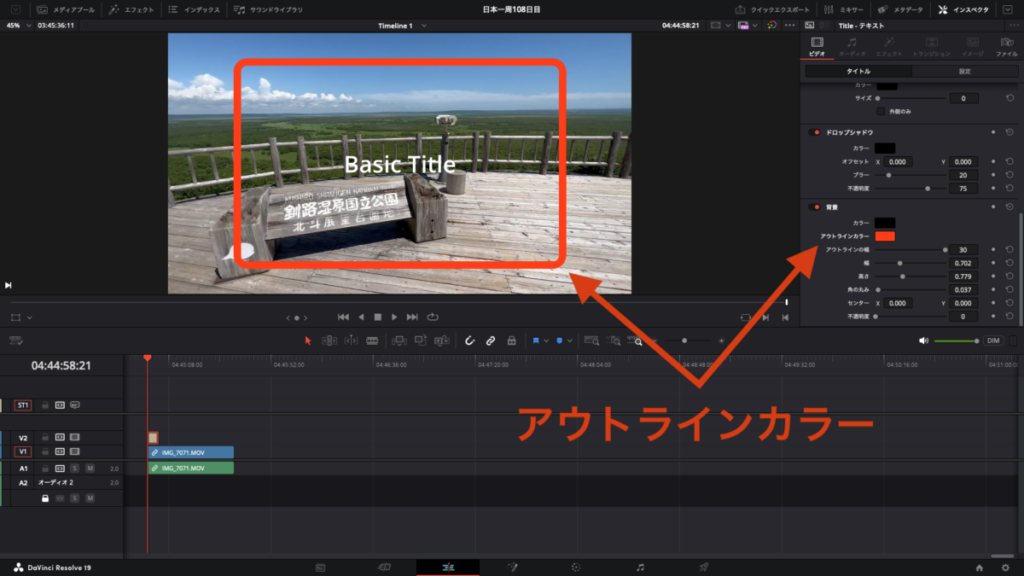
「背景」の中にある「アウトラインの幅」を調整すると半透明の枠周辺にアウトラインが出現。
![DaVinci Resolve 枠 アウトラインの幅 調整](https://photoroamer.jp/wp-content/uploads/2024/11/9780dc7a4f9aefd2f6954880c1007daa-1.png)
![DaVinci Resolve 枠 アウトラインの幅](https://photoroamer.jp/wp-content/uploads/2024/11/2d17bd9f8466f006e8438dc58cc40684-1024x576.png)
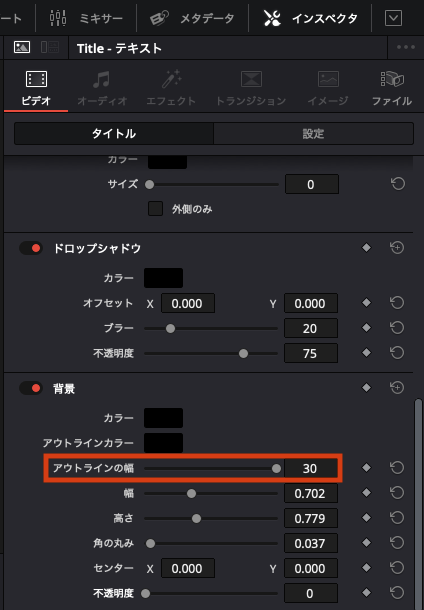
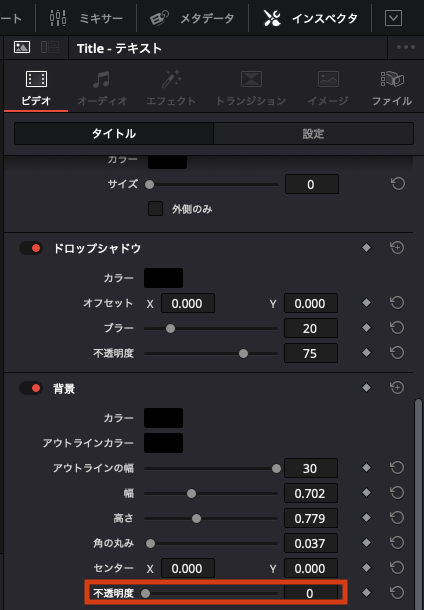
「背景」の中にある「不透明度」の数値を0にするとアウトライン内の半透明のボカシが消えアウトライだけが綺麗に残ります。
![DaVinci Resolve 枠 不透明度 調整](https://photoroamer.jp/wp-content/uploads/2024/11/55622e528b8f2c8df33608f02f991376.png)
![DaVinci Resolve 枠 不透明度](https://photoroamer.jp/wp-content/uploads/2024/11/f859b8815532f803b03769eda6e79845-1024x576.png)
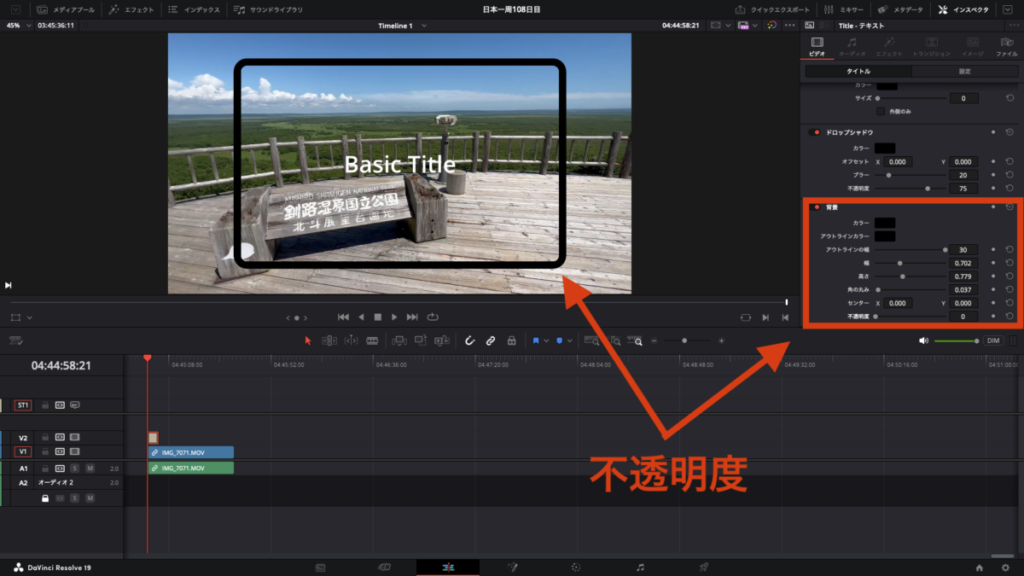
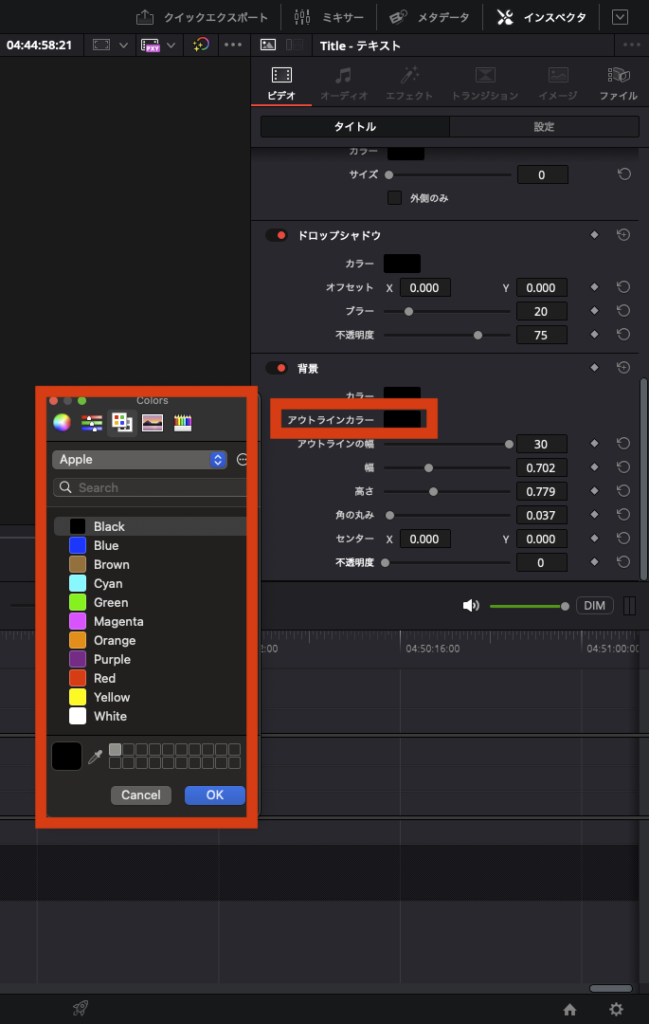
残ったアウトラインの枠色は「アウトラインカラー」で自由に変更可能。
![DaVinci Resolve 枠 アウトラインカラー 選択](https://photoroamer.jp/wp-content/uploads/2024/11/52bcdce06f38fc713696abf7e4226203-649x1024.png)
![DaVinci Resolve 枠 アウトラインカラー](https://photoroamer.jp/wp-content/uploads/2024/11/f26fdea190e34684763b7d46093e42b7-1024x576.png)
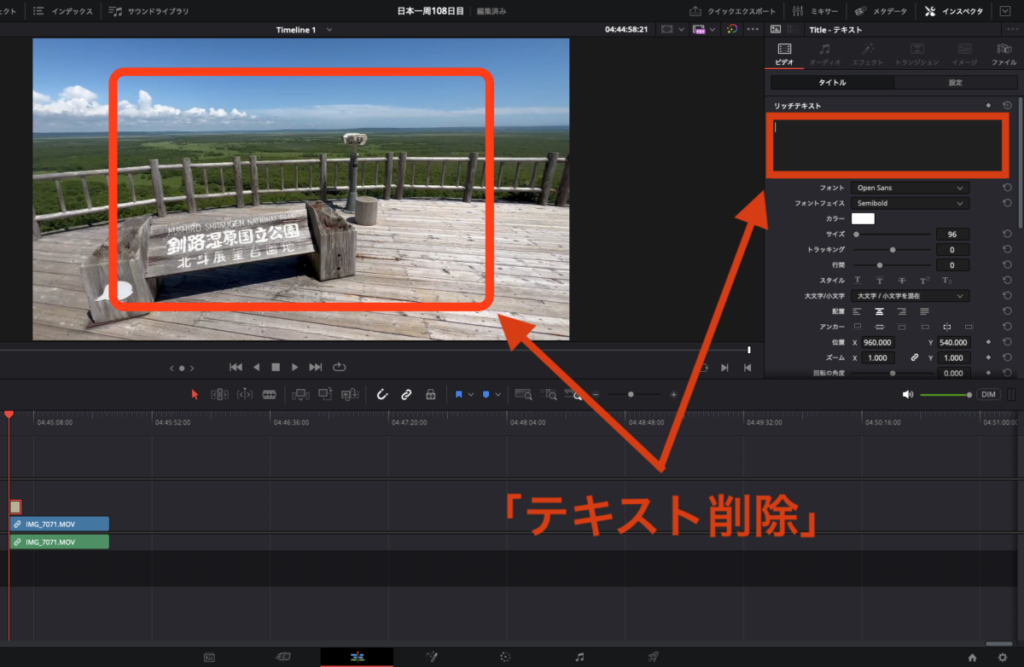
アウトラインの枠内に残された「Basic Title」のテキストを削除すると枠だけが残り枠の完成。
![DaVinci Resolve 枠 テキスト削除前](https://photoroamer.jp/wp-content/uploads/2024/11/2d8240b4cd35e38f75f6520ca8721238-1024x667.png)
![DaVinci Resolve 枠 テキスト削除後](https://photoroamer.jp/wp-content/uploads/2024/11/abe6b08831eca32ad07804cafbc61a2e-1024x667.png)
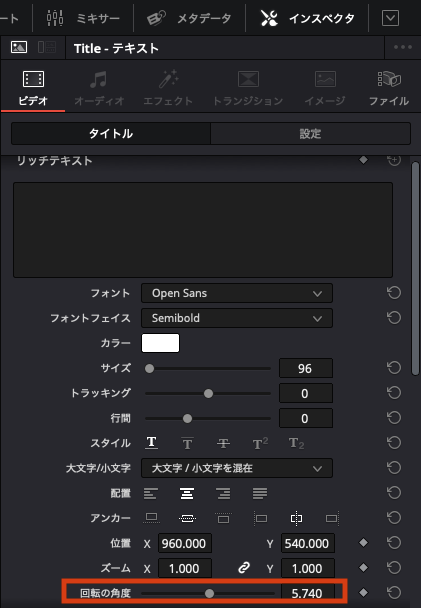
3.DaVinci Resolve|枠の位置・角度調整
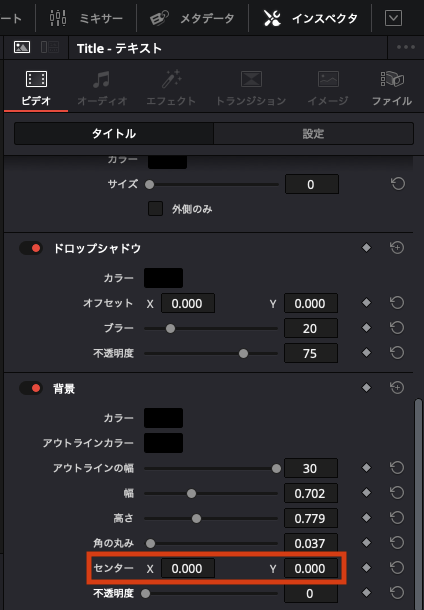
完成した枠の位置は「背景」の中にある「センターX」で左右位置、「センターY」で縦位置の調整が可能。
![DaVinci Resolve 枠 位置調整 XY 調整](https://photoroamer.jp/wp-content/uploads/2024/11/f4c5a7cfba94e055712f640ac70a1242.png)
![DaVinci Resolve 枠 位置調整 XY](https://photoroamer.jp/wp-content/uploads/2024/11/124892a27b06b089fb2eeab83e09ce12-1024x576.png)
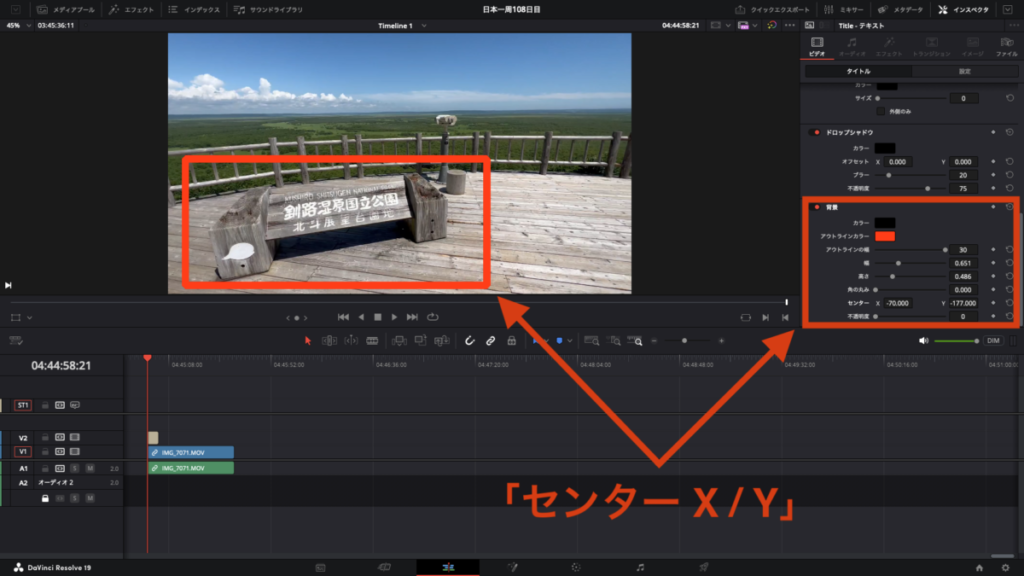
枠の角度もテキスト編集の中にある「回転の角度」で調整することが可能。
![DaVinci Resolve 枠 角度 調整](https://photoroamer.jp/wp-content/uploads/2024/11/9563e9d3601a1f017c4c33ebb2c077d8.png)
![DaVinci Resolve 枠 角度調整](https://photoroamer.jp/wp-content/uploads/2024/11/65122f03a833a7029e27bcc5fbce0fa1-1024x576.png)
![](https://photoroamer.jp/wp-content/uploads/2019/12/cf9cd54a125c935cb8bf0dfb2990fe46-e1645953834805-150x150.jpg)
調整方法の順番は自分のやりやすい方法で試して下さい。
DaVinci Resolveのエディットモードで枠を作成したい人に少しでも参考になれば幸いです。