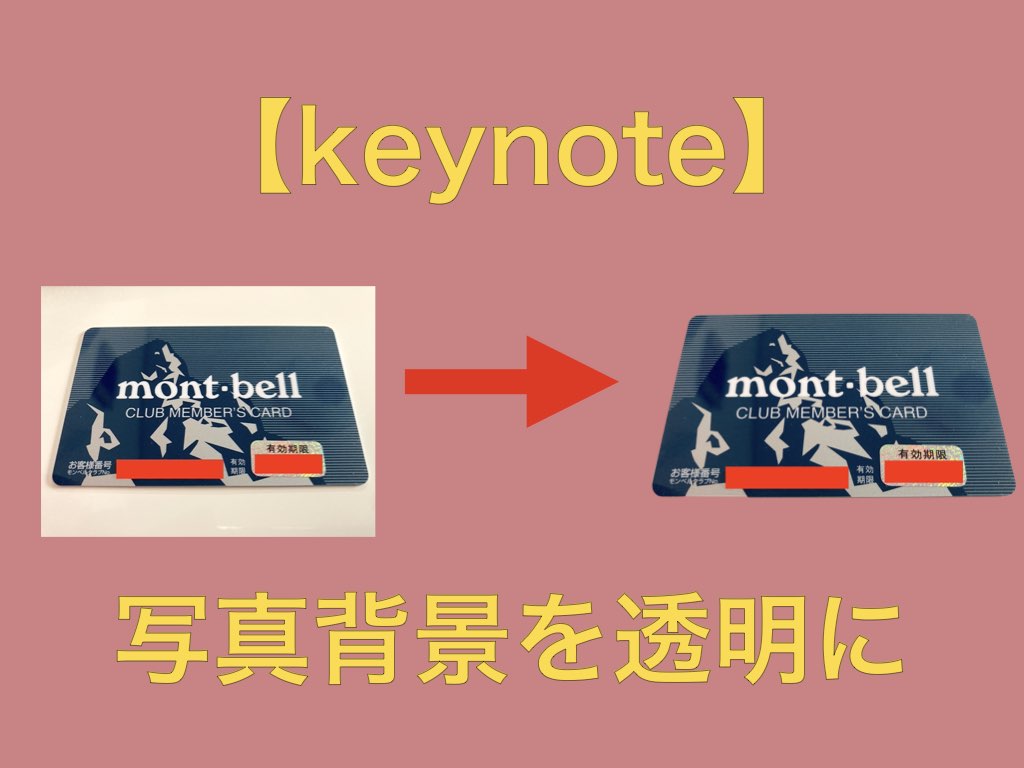
Macのデフォルトで入っているkeynoteを使い写真の背景を透明にする方法を紹介します。
Macユーザーの方で無料で写真の背景を透明にしたい人は、ぜひ参考にしてみて下さい。
- Keynoteに背景を透明にしたい写真を取り込む
- 透明にしたい写真で「イメージ」ー「インスタントアルファ」を選択
- 透明にしたい色を選択し背景を削除
背景を透明にしたい写真の用意
今回は写真の背景を透明にし2枚の写真を1枚の写真にする流れを紹介します。
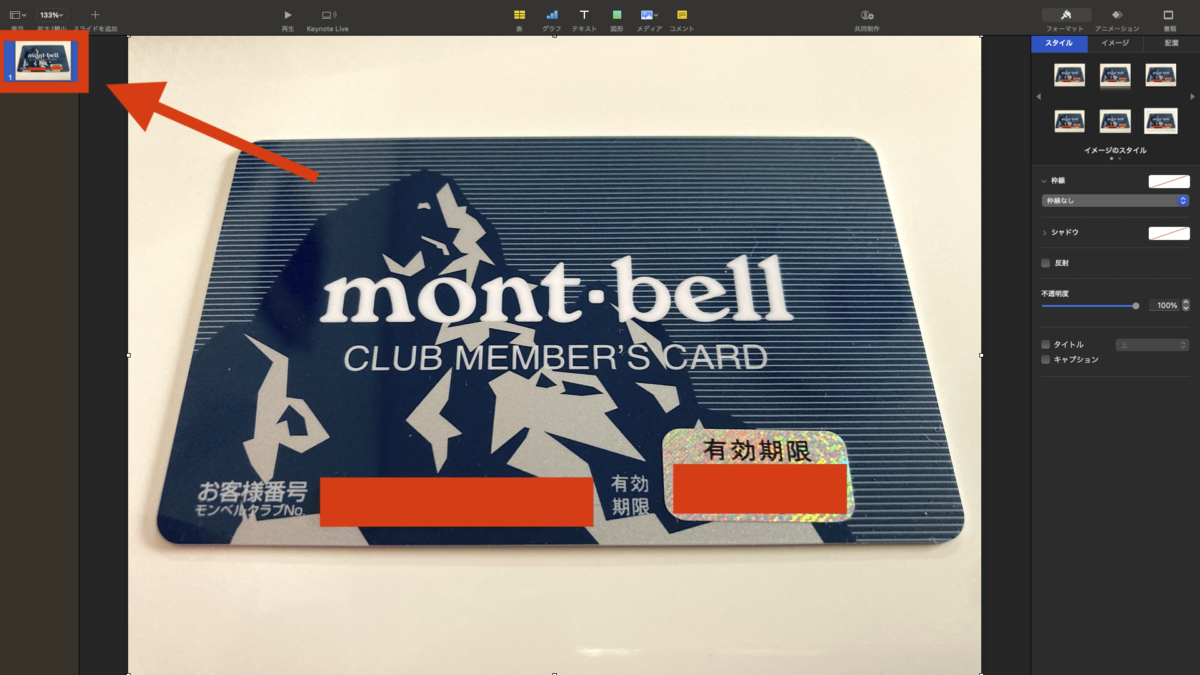
使用する写真素材には最近会員になったモンベルのメンバーズカードと【車中泊で日本一周ひとり旅】で訪れた福井のモンベルショップの2枚の写真を利用しました。
写真素材1

写真素材2

モンベルカードの背景を透明に1枚の写真にしたものがこちら。
背景が透明の完成写真

モンベルカードの背景にあった白色の背景が透明になり1枚の写真に馴染んでいます。
ちなみに写真の背景を透明にしないで1枚の写真にしたものがこちら。
背景未処理の写真

背景のある写真もおかしくはないですが白い背景が写真の中で少し浮いた感じになります。
背景のある写真の方が良いという声も聞こえてきそうですが気にせず先へ進みます(笑)
keynoteで写真の背景を透明にする方法
Keynoteで写真の背景を透明する方法は次の3ステップになります。
- Keynoteに背景を透明にしたい写真を取り込む
- 透明にしたい写真で「イメージ」ー「インスタントアルファ」を選択
- 透明にしたい色を選択し背景を削除
1.Keynoteに背景を透明にしたい写真を取り込む
2.透明にしたい写真で「イメージ」ー「インスタントアルファ」を選択
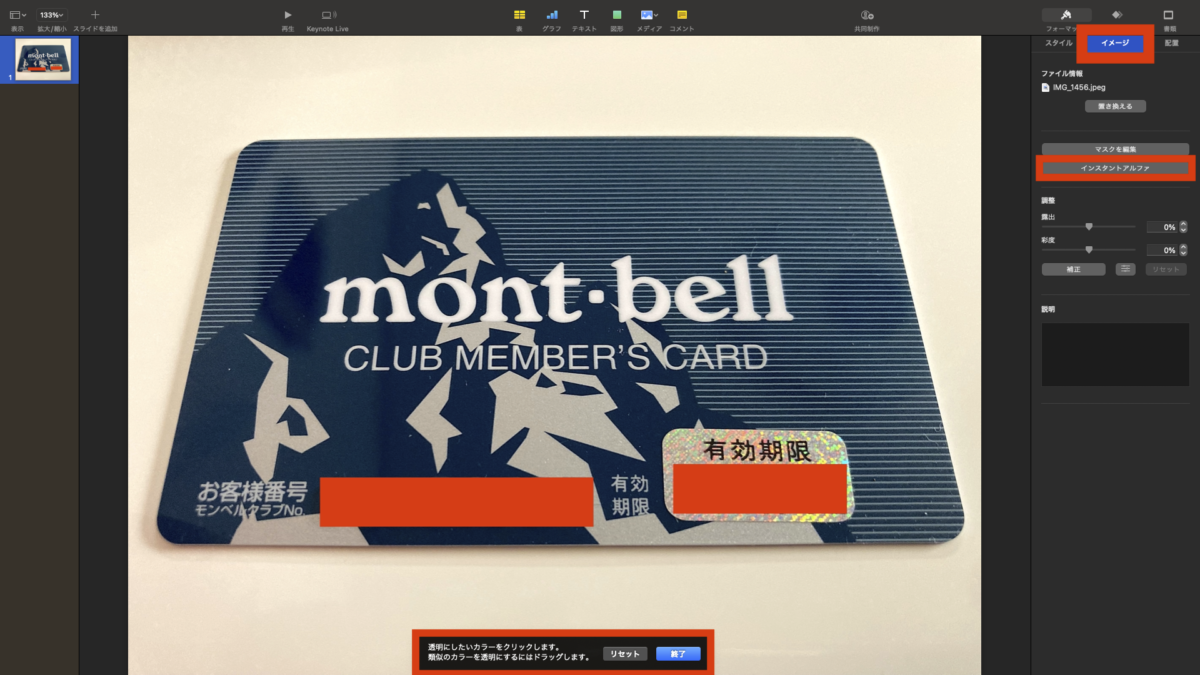
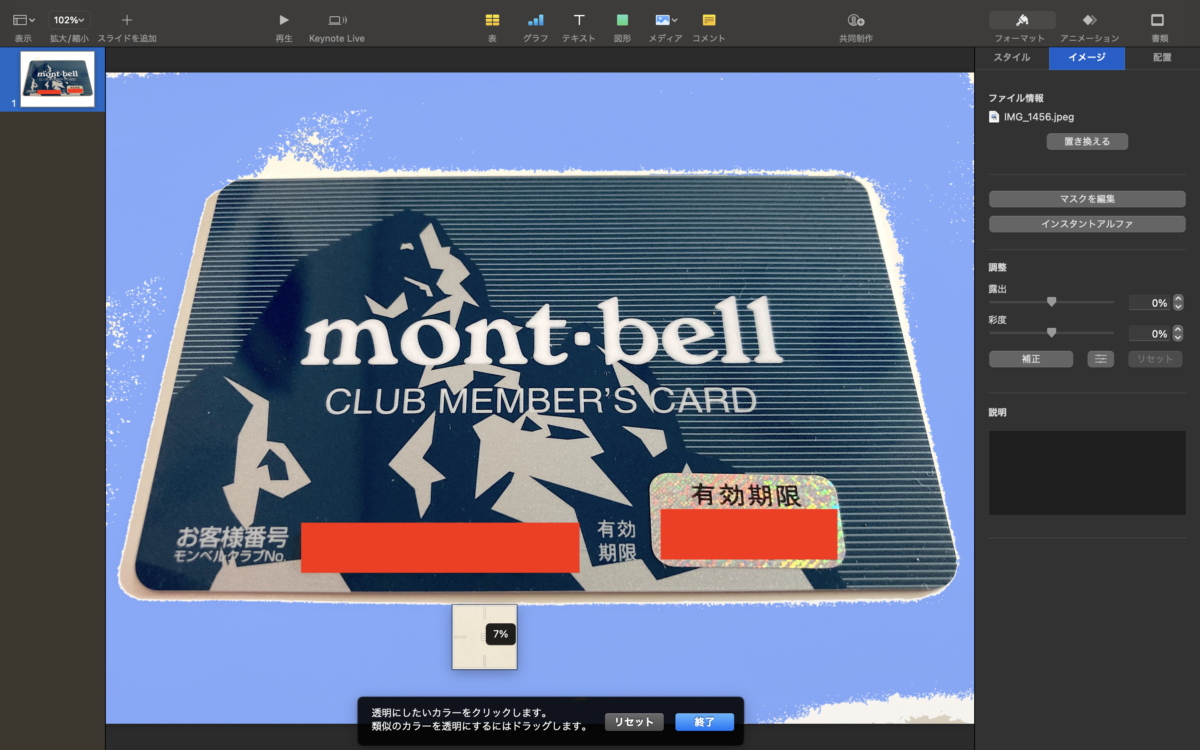
インスタントアルファを選択すると画面下に次のようなメッセージが表示されます。
透明にしたいカラーをクリックします。
類似のカラーを透明にするにはドラッグします。
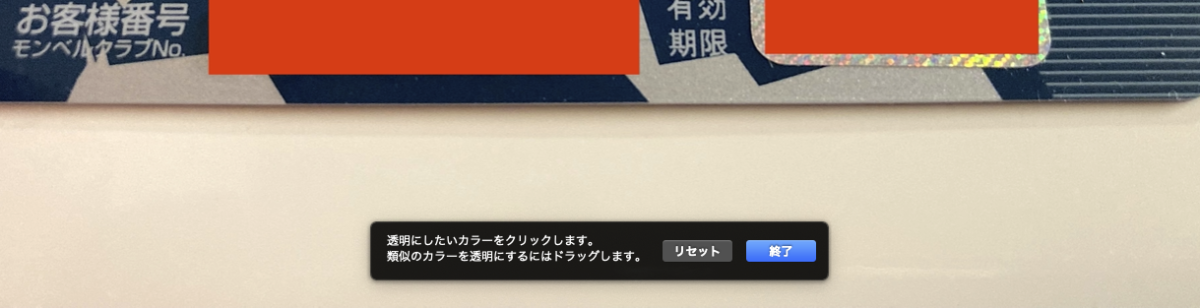
3.透明にしたい色を選択し背景を削除
インスタントアルファを選択するとカーソル部分に拡大鏡が表示されるようになります。

この拡大鏡で背景背景を透明にしたい部分を選択しドラッグすると透明になる部分が青色で表示されます(ドラッグする方向は上下左右どこでも大丈夫です)
 マサユキ
マサユキあまりドラッグし過ぎると写真の残したい部分も透明になってしまうので注意して下さい。

写真の背景をうまく透明にできた後は写真を書き出して保存。
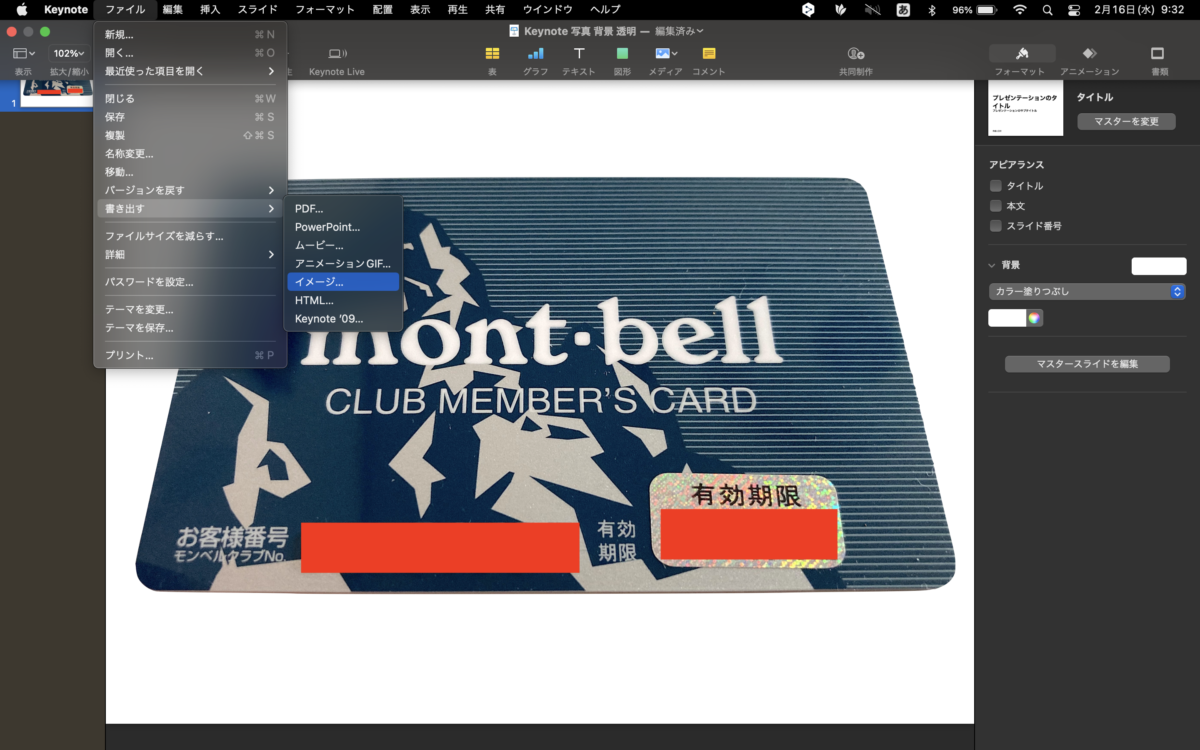
「ファイル」ー「書き出す」ー「イメージ」ーJPEGやPNGなど保存したいファイル形式を選択
背景が透明になった写真を書き出して見ると背景が綺麗に消えていました。

あとはKeynoteに入れているモンベルの写真に背景を透明にしたメンバーカードの写真をドラッグ。

大きさを調整すれば2枚の写真を1つにすることができました。
マサユキMacにデフォルトで入っている無料のkeynoteだけで全ての処理ができるので助かります。
まとめ
Macのデフォルトで入っているkeynoteを使い写真の背景を透明にする方法を紹介してきましたが、いかがでしたか。
1度やり方を覚えてしまえば様々な写真加工に応用することができます。
この記事がMacで写真の背景を透明にしたい人の少しでも参考になれば幸いです。